martes, 27 de septiembre de 2011
Importar contactos de correo Exchange 2010
1 - Crear el CSV con lo siguiente en la primera fila, el resto en filas siguientes:
displayName,Firstname,EmailNddress
2 Utilizar el comando en la shell de Exchange:
Import-Csv c:\prueba2.csv |ForEach { New-MailContact -Name $_.displayName -FirstName $_.FirstName -ExternalEmailAddress $_.EmailNddress -OrganizationalUnit "dominio.local/ou1/ou2"}
Y a disfrutar
viernes, 23 de septiembre de 2011
Como ver trafico en router cisco
Mira con los routers Cisco puedes monitorear el trafico de bastantes maneras
las mas faciles son las siguientes:
Entra a la interface que quieres monitorear
ejemplo:
LAN-2-VPN-1(config)# int GigabitEthernet0/1.598
LAN-2-VPN-1(config-subif)#ip nba
LAN-2-VPN-1(config-subif)#ip nbar pr
LAN-2-VPN-1(config-subif)#ip nbar protocol-discovery
ahora da el comando LAN-2-VPN-1# sh ip nbar protocol-discovery
GigabitEthernet0/1
Input Output
----- ------
Protocol Packet Count Packet Count
Byte Count Byte Count
5min Bit Rate (bps) 5min Bit Rate (bps)
5min Max Bit Rate (bps) 5min Max Bit Rate (bps)
------------------------ ------------------------ ------------------------
telnet 1808 1316
226340 77950
0 0
4000 3000
icmp 692764 87
56810048 10234
0 0
3000 3000
snmp 17010 16992
1938418 2213653
0 0
2000 2000
h323 66 0
7966 0
0 0
3000 0
ntp 7734 7735
726996 727090
0 0
0 0
ssh 0 115
ves como te muestra el trafico que pasa por tu interface y el protocolo que esta usando???
mas facil si lo quieres por IP
pon este comando
LAN-2-VPN-1(config-subif)#ip accounting
ahora:
LAN-2-VPN-1# sh ip accounting
Source Destination Packets Bytes
89.206.213.245 89.206.214.32 1 76
89.206.213.242 89.206.214.16 2 221
Ahora si tienes NAT instalado en tu equipo dale un sh ip nat translations y podras ver quien hace peticiones a internet y hacia que paginas
new_york_r3# sh ip nat translations
Pro Inside global Inside local Outside local Outside global
Gracias a: Tigre
miércoles, 24 de agosto de 2011
¿Cómo migrar GPOs a otro bosque?
En muchas ocasiones recibimos consultas sobre cómo realizar la copia o migración de GPOs de un bosque a otro diferente. Hoy vamos a tratar este tema.
Como sabéis, a través de GPOs podemos desplegar muchos tipos de configuraciones. Con frecuencia, estas configuraciones contienen información específica que pertenece al propio dominio o a objetos en él. Es por esto que, si se importan las GPOs de un entorno directamente en otro con la GPMC (Group Policy Management Console – gpmc.msc) va a haber una serie de rutas, objetos y/o “SIDs” que el dominio destino no va a poder traducir, al tratarse de rutas o SIDs pertenecientes a otro entorno que desconoce y que no existen en él.
Será necesario que la configuración se “traduzca” para que los datos referenciados tengan “sentido” en el nuevo entorno. En el ejemplo mostrado en el siguiente dibujo, queremos migrar la GPO X del dominio B de nuestro bosque de pruebas al dominio E de nuestro bosque de producción. En este proceso necesitamos traducir la configuración del derecho de usuario “Log on locally” configurado en la GPO para reflejar los nuevos grupos/usuarios del bosque de producción, en lugar de referenciar a los de nuestro bosque de pruebas.
Por lo tanto, si lleváramos a cabo esta importación, el mecanismo para conseguir que las GPOs hagan referencia a objetos del dominio local sería llevar a cabo una modificación manual de la configuración de las GPOs, lo cual podría convertirse en una tarea muy tediosa y susceptible a fallos.
No obstante, existe la posibilidad de llevar a cabo la migración ayudándonos de “tablas de migración” a la hora de importar las GPOs. Con estas tablas vamos a poder especificar la correspondencia entre rutas/objetos del dominio origen y rutas/objetos del dominio destino, tal y como se indica en los siguientes artículos:
When using import to transfer GPO settings to a GPO in a different domain or different forest, you may want to use a migration table in conjunction with the import operation. A migration table allows you to facilitate the transfer of references to security groups, users, computers, and UNC paths in the source GPO to new values in the destination GPO.
To transfer the settings in GPO X from domain B in the test forest to a GPO in domain E in the production forest, the administrator must use an import operation and a migration table because trust does not exist between domain B and domain E. If trust did exist, it would also be possible to do this with a copy operation. When you use a migration table together with the import or copy operation, the Group Policy Management Console (GPMC) enables the administrator to update the settings in the destination GPO to the new values that are appropriate for the destination domain.
Con la ayuda de estas “tablas de migración” se va a facilitar el proceso de importar las GPOs en el dominio destino, ya que nos va a ayudar a realizar la traducción de lo que especifiquemos en dichas tablas en la GPO importada automáticamente.
Por ejemplo, las siguientes configuraciones contienen Security Principals y pueden ser modificados durante una importación utilizando una “tabla de migración”:
- Configuración de políticas de Seguridad de los siguientes tipos:
- Asignación de Derechos de Usuario.
- Grupos Restringidos.
- Servicios.
- Sistema de Ficheros.
- Registro.
- Configuración avanzada de las políticas de Redirección de Carpetas.
- La DACL de la GPO si queremos preservarla durante la copia.
- Las DACLs en los objetos de Instalación de Software.
Las siguientes configuraciones pueden contener rutas UNC que puede ser necesario actualizar a nuevos valores durante la migración:
- Configuración de las políticas de Redirección de Carpetas
- Configuración de las políticas de Instalación de Software.
- Configuración de políticas de Scripts (Ejecución de comandos), tales como los de Arranque e Inicio de Sesión, que puedan referenciar rutas UNC.
Hay otras configuraciones que pueden referenciar tanto a Security Principals como rutas UNC en otras políticas, como en algunas Plantillas Administrativas. Estas configuraciones no se pueden mapear con la información de la “tabla de migración”, por lo que se copiarán tal cual.
Las “tablas de migración” se implementan como ficheros XML con la extensión “.migtable”, pero no os preocupéis porque no tendréis que lidiar con los tags ni con la estructura de estos ficheros si no queréis, ya que la GPMC incorpora un “Editor de tablas de migración”, que podéis encontrar en %programfiles%\gpmc\mtedit.exe. También podéis acceder al editor desde el menú contextual (click derecho) del nodo Domains o Group Policy Objects de la GPMC y seleccionando Open Migration Table Editor.
Podéis ver un ejemplo de “tabla de migración” en %programfiles%\GPMC\scripts\SampleMigrationTable.migtable.
En el siguiente enlace podéis obtener un documento que constituye una guía detallada de migración de GPOs de un dominio a otro con ejemplos, explicaciones detalladas de las tablas de migración y sus opciones de mapeo, etc.:
Aunque en el documento podéis encontrar los pasos de migración en detalle, os indico a continuación los pasos generales que tendríais que realizar para que veáis en qué consiste y el trabajo de búsqueda y traducción que os vais a evitar utilizando “tablas de migración”:
- Crear un backup de la GPO original desde la GPMC y guardarlo en disco.
- Crear una nueva GPO en el entorno de producción.
- Crear la tabla de migración desde el Editor, y desde el menú Tools, seleccionar Populate from Backup para que la autogenere desde la copia de seguridad creada en el punto 1.
- Editar la tabla de migración y mapear todo lo necesario.
- Importar la copia de seguridad de la GPO en la nueva política que hemos creado en el punto 2, indicando la ruta de la copia de seguridad y de la tabla de migración que queremos usar y que hemos completado en el punto 4.
- Configurar aspectos adicionles como filtrado de seguridad, permisos, etc.
- Enlazar la nueva GPO a los contenedores deseados en Directorio Activo.
En los siguientes enlaces podréis encontrar más información sobre las “Tablas de migración” y el “Editor de tablas de migración” incluido en la GPMC, así como ejemplos de uso:
Si vais a realizar una migración de este tipo, es importante que reviséis el siguiente artículo ya que incluye un fix que solventa algunos problemas, por ejemplo con las políticas de 802.1x:
Espero que esta información os resulte útil a la hora de crear y probar vuestras GPOs y migrarlas al entorno de producción.
- Paula Tomás Galed
viernes, 1 de julio de 2011
Conectar por red a recursos administrativos
El problema es una directiva de seguridad local:
Under Administrative Tools:
LOCAL SECURITY SETTINGS
LOCAL POLICIES
SECURITY OPTIONS
Network Access: Sharing and security model for local
accounts.
Value was "Guest Only ... " That seemed screwy to me, so I changed the
value to "Classic - local users authenticate as themselves"
sábado, 14 de mayo de 2011
Configuración agente snmp en Windows Vista, 7 y 2008
Extraido de:
http://eder1204.blogspot.com/2008/11/configuracin-agente-snmp-en-windows.htmlConfiguración agente snmp en Windows vista


 F: En este paso vamos a configurar el agente SNMP en nuestro equipo para que el servidor pueda monitorearlo, abrimos el panel de control y seleccionamos Herramientas administrativas:


Guia de Instalacion de Cacti (Probada en CentOS 5.5)
Extraido de:
http://www.punto-libre.org/2010/09/guia-de-instalacion-de-cacti-probada-en.html
Guia de Instalacion de Cacti (Probada en CentOS 5.5)

¿Qué es una RRDtool?
RRDtool es el acrónimo de Round Robin Database tool, o sea que se trata de una herramienta que trabaja con una BD que manejaPlanificación Round-robin. Esta técnica trabaja con una cantidad fija de datos y un puntero al elemento actual. El modo en que trabaja una base de datos utilizando Round Robin es el siguiente; se trata la BD como si fuera un círculo, sobrescribiendo los datos almacenados, una vez alcanzada la capacidad de la BD. La capacidad de la BD depende de la cantidad de información como historial que se quiera conservar.
¿Qué tipo de datos pueden ser almacenados en una RRD?
Cualquiera, siempre que se trate de una serie temporal de datos. Esto significa que se tiene que poder realizar medidas en algunos puntos de tiempo y proveer esta información a laRRDtool para que la almacene.
Un concepto ligado a las RRDtool es el de SNMP, acrónimo de Simple Network Management Protocol. Este protocolo puede ser usado para realizar consultas a dispositivos acerca del valor de los contadores que ellos tienen (ej: una impresora). El valor obtenido de esos contadores es el que queremos guardar en la RRD.
¿Qué puedo hacer con esta herramienta?
Puedo, a través de Cacti , representar graficamente los datos almacenados en la RRD: uso de conexión a internet, datos como temperatura, velocidad, voltaje, número de impresiones, etc. La RRD va a ser utilizada para almacenar y procesar datos recolectados vía SNMP.
En definitiva, para hacer uso de una RRDtool, lo que se necesita es un sensor para medir los datos y poder alimentar al RRDtool con esos datos. Entonces, la RRDtool crea una base de datos, almacena los datos en ella, recupera estos datos y basandose en ellos, Cacti crea gráficos en formato PNG.
Mas info: Wikipedia
Para manejar equipos dentro de Cacti, haga click en Devices en el menú de la izquierda. Luego haga click en Add para llenar el formulario de una nuevo equipo. Los primeros dos campos, Description y Hostname son los únicos campos que requieren entrada mas allá de las por defecto. Si su tipo de host esta definido bajo el menu desplegable, asegúrese de seleccionar este en el menú. Usted siempre puede elegir “Generic SNMP-enables host” si solo va a graficar trafico o “None” si no esta seguro.
viernes, 13 de mayo de 2011
Instalación de CentOS 5.5 en hyper-V R2
http://www.jcarle.com/2010/12/06/installing-centos-5-5-with-linux-integration-services-2-1-on-hyper-v-r2/
Tras muchos cabezazos con diferentes versiones de Linux (uno que no está acostumbrado), y busar por todos lados, y siempre en el mismo error.
El error era que la red no me la cargaba, porque dejaba la red que viene por defecto en la máquina virtual. Y en todos los manuales dicen que actualices( ¿Como quieres que actualice si no tengo red?)
En fin gracias al manual que os pego, vi que hay que configurar una tarjeta en español "adaptador de red heredado", y todo ok.
Os lo paso
Installing CentOS 5.5 with Linux Integration Services 2.1 on Hyper-V R2
Hyper-V R2 brings some powerful virtualization to the table for those of us who do not have either the skills or the desire to work with virtual machineware. Most fans of Hyper-V are also likely to be well versed in Windows and may often lack the knowledge to rummage through Linux. Although there are many resources available regarding Linux on Hyper-V, I felt that most assumed the reader had intimate knowledge with Linux, which is often not the case.
For Windows administrators new to Linux who wish to provide virtualized services to their end-users, my recommendation is to stick to CentOS 5.5. Being a close derivative of Red Hat Enterprise Linux (RHEL), the officially supported distribution by Microsoft, installation of the Integration Components is simplified and stability is matched to what is found when running RHEL.
Requirements
You will need the CentOS 5.5 x64 installation DVD ISO (CentOS-5.5-x86_64-bin-DVD-1of2.iso) which can be found at http://isoredirect.centos.org/centos/5/isos/x86_64/.
You will also need the Linux Integration Services 2.1 ISO (LinuxIC v21.iso) available through the Microsoft Download Center at http://www.microsoft.com/downloads/en/details.aspx?FamilyID=eee39325-898b-4522-9b4c-f4b5b9b64551.
Initial virtual machine Settings
To create the initial virtual machine, you will need to use the Legacy Network Adapter and limit yourself to a single CPU. You will also want to take time to decide how large of a VHD to allocate ahead of time as expanding a Linux partition can be a little complicated. Personally, I find 20GB to be sufficient for small, single purpose Linux virtual machines.
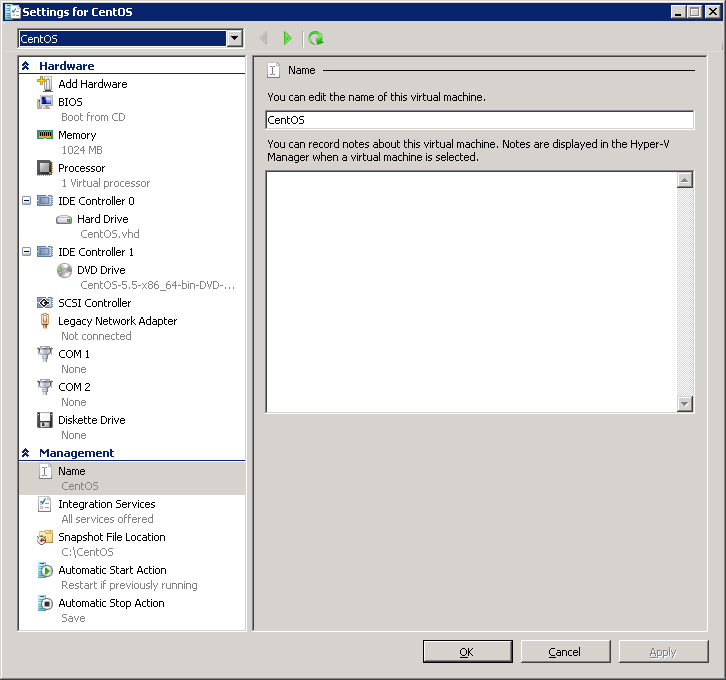
Installing CentOS 5.5
After booting from the CentOS ISO, you are presented with the choice to do a graphical or a text mode installation. To choose the text mode installation (as used here), simply type “linux text” at the boot: prompt and hit enter.
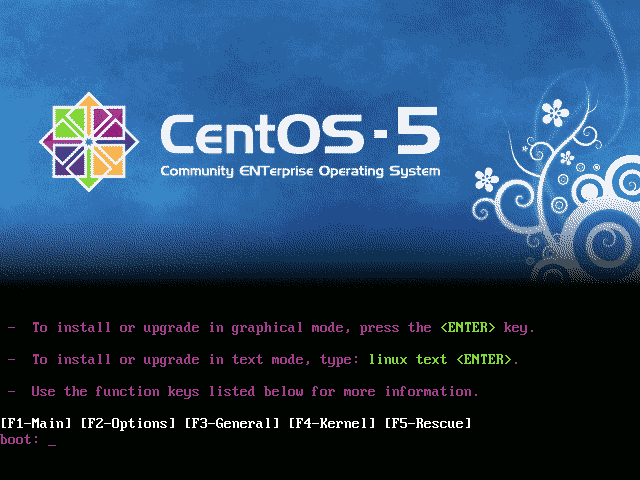
To navigate throughout the next portion of the text mode installation, use the Tab key to navigate between fields and the Space key to select options or hit buttons.
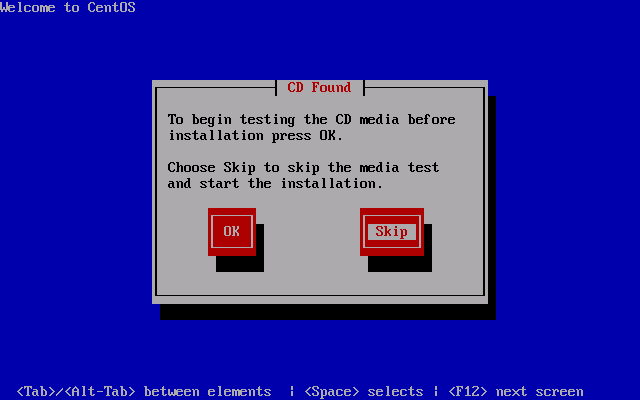
You will be asked if you would like to do a media test. You can safely skip this.
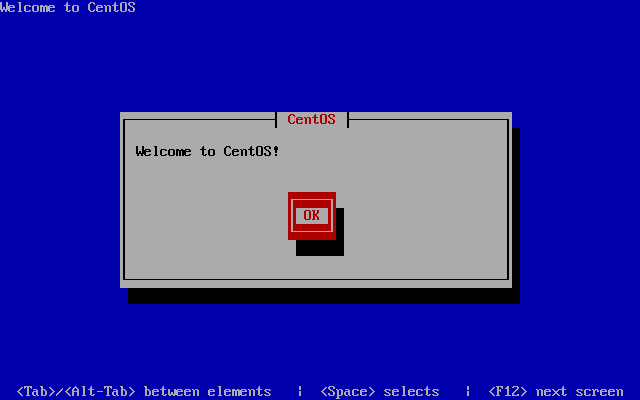
The initial welcome screen to the installation process.
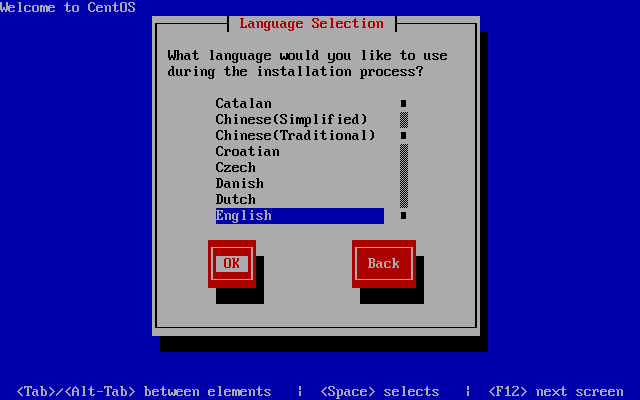
Choose your language as appropriate.
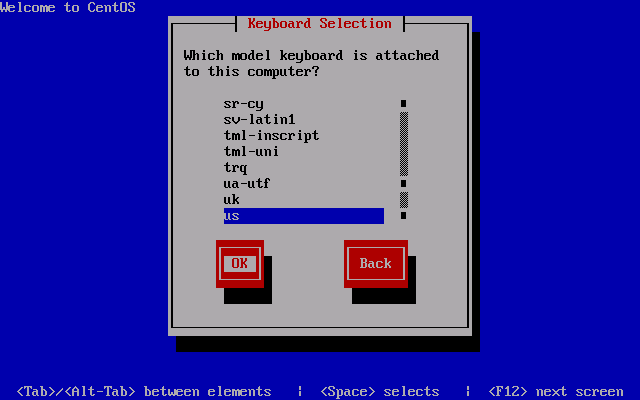
And your keyboard.
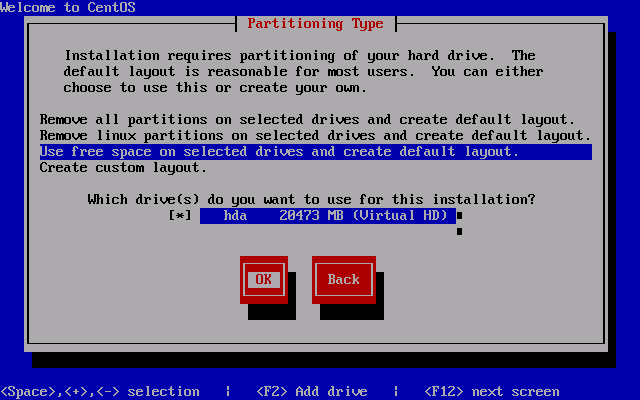
You must then partition your VHD for Linux. As you will be starting off with a fresh VHD, you can simply choose “Use free space on selected drives and create default layout.” and continue with OK.
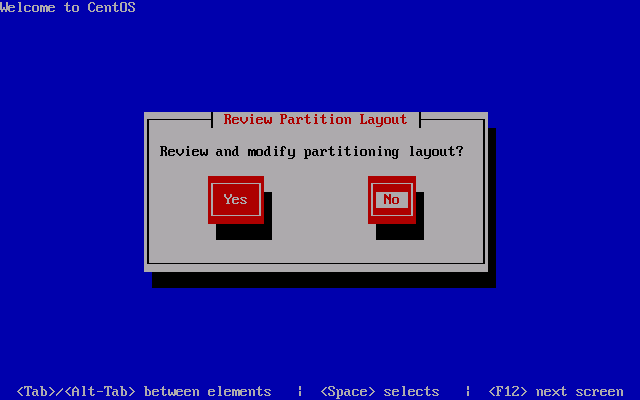
Be sure to hit No to continue as hitting Yes will simply bring you back to the previous screen.
As long as you have properly configured your virtual machine to use the Legacy Network Adapter, you will be presented with the opportunity to have the installation configure it for you.
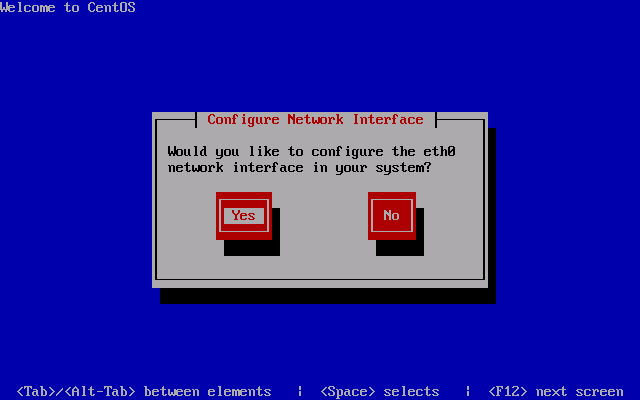
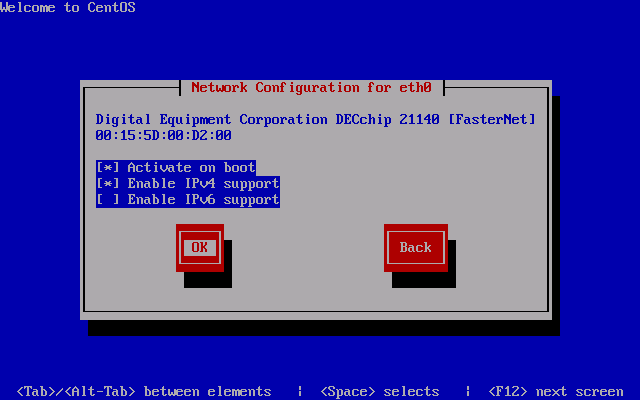
Check the “Enable IPv4 support” option and hit OK to continue.
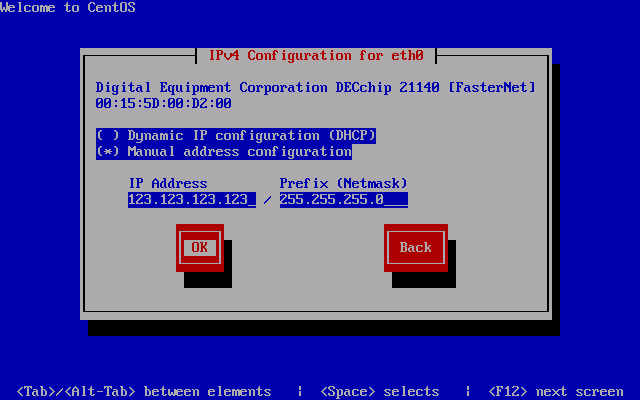
Switch to the “Manual address configuration” option and enter your IP address and netmask as appropriate.
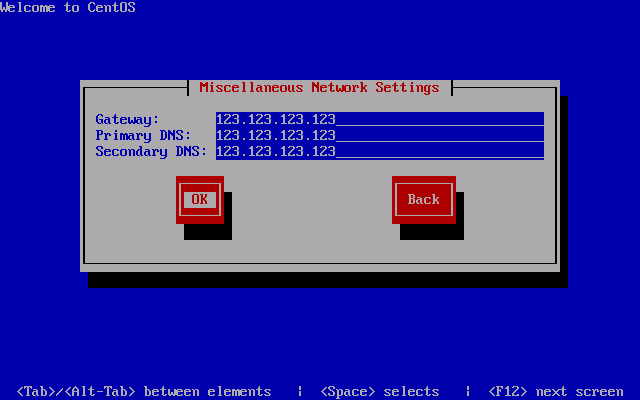
Continue on by entering your default gateway (usually your router or your network’s default route). If you have internal DNS servers for your network, enter them here or alternatively, you can use OpenDNS.
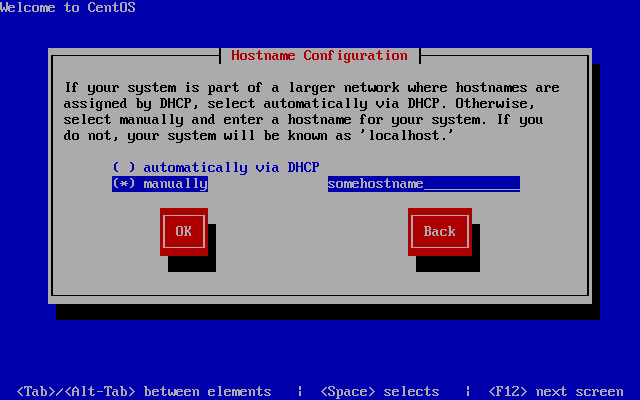
The name of your virtual machine is defined here as the hostname.
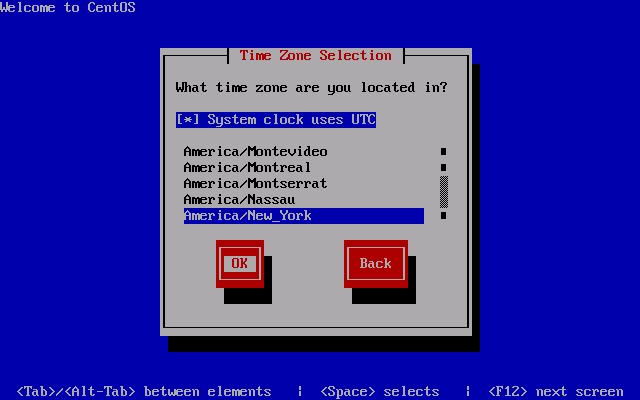
Select your time zone and continue.
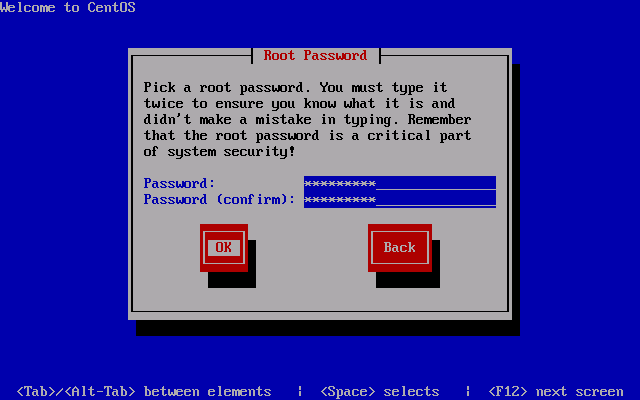
Be sure to choose a secure root password as the root user has complete access to the entire virtual machine and SSH is enabled on first boot.
For a bare minimum installation, uncheck all of the packages, check “Customize software selection” and hit OK.
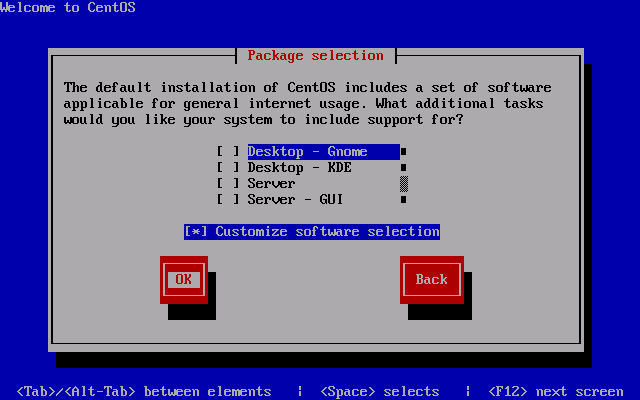
Uncheck all package groups and continue. Anything you require can later be installed by yum anyway.
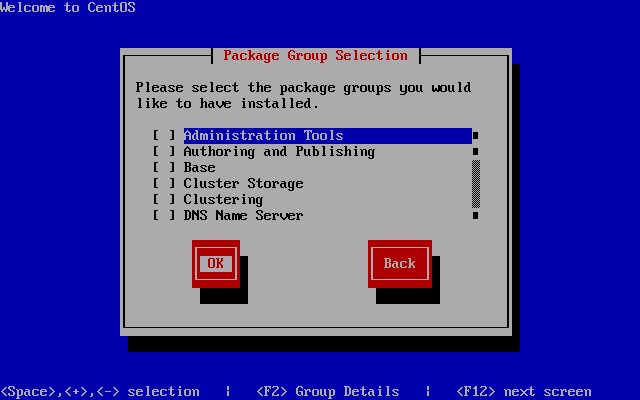
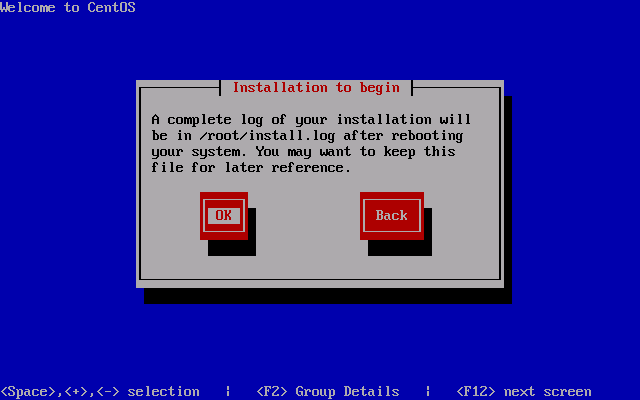
Installation will begin once you continue past this screen.
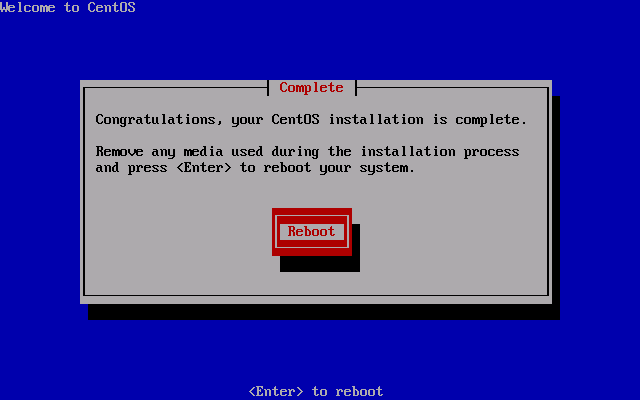
Once installation is complete, you will be required to reboot.
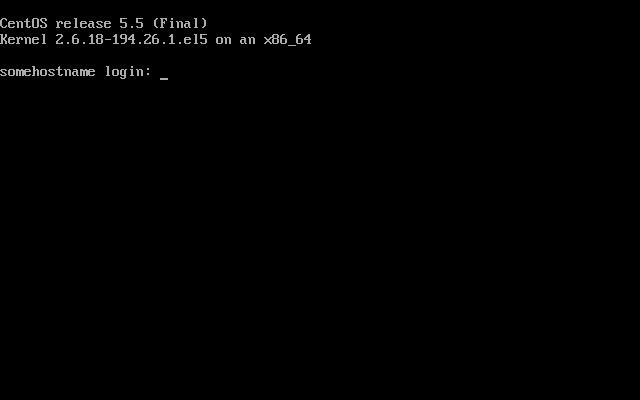
After rebooting, you will be ready to login. At this point, I recommend connecting via SSH in order to copy and paste commands.
Preparing to install the Linux Integration Components
The first thing that must be done is to update all the base packages and upgrade the kernel to the latest version. Simply run a “yum update”, then reboot.
1 2 | yum updatereboot |
You will need to install the required “kernel-devel”, “gcc”, “make” and “perl” packages to compile and install the Linux Integration Components. Also, I suggest installing the VIM text editor.
1 2 3 4 5 | yum install kernel-develyum install gccyum install makeyum install perlyum install vim-enhanced.x86_64 |
Installing the Linux Integration Components
Attach the Linux Integration Services ISO. Once attached, you will need to mount the cdrom. You must then copy and compile the source in a temporary folder. Finally, you will be able install the Linux Integration Components. “make” will compile the source, then “make install” will install the compiled drivers.
1 2 3 4 5 6 7 | mkdir -p /mnt/cdrommount /dev/cdrom /mnt/cdromcp -rp /mnt/cdrom /opt/linux_icumount /mnt/cdromcd /opt/linux_icmakemake install |
The time synchronisation component is not compatible with CentOS, therefore you will need to install “adjtimex”.
1 | yum install adjtimex |
You will need to shutdown the virtual machine in order to enable the Synthetic Network Adapter and increase the number of CPUs allocated. To do so, run the shutdown command.
1 | shutdown -h -t 0 0 |
Change the settings in Hyper-V once the virtual machine has completely shutdown.
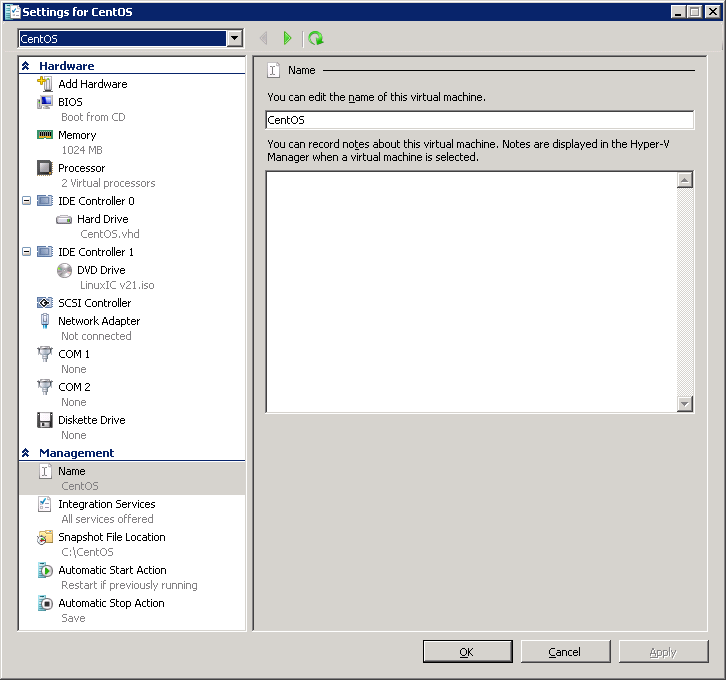
Start the virtual machine and log in. You will need to reconfigure the network adapter as “eth0″ will have disapeared and a new adapter, “seth0″, will have taken its place.
The easiest way to do this is to edit the MAC address in the “eth0″ backup file to match the MAC address of the Network Adapter as displayed in the virtual machine settings in Hyper-V, then copy the backup file as “seth0″ and restart the network service. Don’t forget to also update the DEVICE line use “seth0″.
1 2 3 4 5 6 7 | cd /etc/sysconfig/network-scripts/vi ifcfg-eth0.bak(edit DEVICE and HWADDR)(save and exit)rm -f ifcfg-seth0mv ifcfg-eth0.bak ifcfg-seth0service network restart |
If all went well, you will find yourself with a bare minimum install of CentOS 5.5 running the latest kernel and version 2.1 of the Linux Integration Services. Fully virtualized and synthetic. You can now enjoy the many benefits of Hyper-V Linux such as the ability to shutdown the virtual machine without the root password.
http://www.jcarle.com/2010/12/06/installing-centos-5-5-with-linux-integration-services-2-1-on-hyper-v-r2/
jueves, 17 de marzo de 2011
Instalar agente Netware en Backupexec 2010
You can install the Remote Agent for NetWare Systems (Remote Agent) on a local NetWare server.
To install the Remote Agent for NetWare Systems
1.
At the Backup Exec media server or a workstation that can access the NetWare server, place the Backup Exec installation media in the appropriate drive.
2.
Log on to the NetWare server on which you want to install the Remote Agent.
3.
Create a directory named BKUPEXEC in the SYS: volume.
4.
Navigate to the following directory on the installation media:
BE\Winnt\Install\Netware\Nwagtacc
5.
Copy the contents of the directory to the SYS:BKUPEXEC directory on the NetWare server.
6.
Navigate to the following directory on the installation media:
BE\Winnt\Install\Netware\Netware\Nksfiles\en
7.
Copy the Novell.nks file to the SYS:BKUPEXEC directory on the NetWare server.
8.
Navigate to the SYS:SYSTEM directory on the NetWare server.
9.
With a text editor, create a file named Bestart.ncf and add the following:
SEARCH ADD SYS:/BKUPEXEC/NLMS
Load SYS:/BKUPEXEC/NLMS/BKUPEXEC.NLM -!x -tr -to %1 %2
Note:
You can remove the -to switch if you do not have a license for the Advanced Open File Option.
10.
Save the Bestart.ncf file.
11.
With a text editor, create a file named Bestop.ncf and add the following:
Load SYS:/BKUPEXEC/NLMS/BESTOP.NLM %1 %2
12.
Save the Bestop.ncf file.
13.
Do one of the following:
If you have a license for the Advanced Open File Option
Do the following in the order listed.
*
Navigate to the SYS:BKUPEXEC directory on the NetWare server.
*
With a text editor, create a file named License.ofo.
*
Enter the Advanced Open File Option license key with no dashes or spaces.
*
Save the License.ofo file.
If you do not have a license for the Advanced Open File Option
Go to step 14.
14.
Create the Advrtms.dat file.
See Creating the Advrtms.dat file.
Creating the Advrtms.dat file
To configure publishing, you must create the Advrtms.dat file. Ensure that this file contains all the names or the IP addresses of the Backup Exec media servers that you want to back up the NetWare server.
See About publishing NetWare servers to the NetWare agents list.
To create the Advrtms.dat file
1.
Navigate to the SYS:BKUPEXEC directory on the NetWare server.
2.
With a text editor, create a file named Advrtms.dat.
3.
Add the name or IP address of the NetWare server.
4.
Save the Advrtms.dat file.
/apps/media/inquira/resources /resources
Article URL http://www.symantec.com/docs/HOWTO24142
/apps/media/inquira/resources /resources
Article URL http://www.symantec.com/docs/HOWTO24144
jueves, 17 de febrero de 2011
Como deshabilitar/habilitar el Firewall (Corta fuegos) en VMware ESX
Cuando se usa VMware ESX es todavía mas importante, porque teniendo acceso a la consola de servicio (service console) se pueden manipular las maquinas virtuales que tengamos corriendo en el host.
En ESX por predeterminado el Firewall esta activado, pero se puede deshabilitar solo por razones de prueba/mantenimiento . Les dejo como manipularlo.
Para apagar/deshabilitar el Firewall:
root@casiopea:$ /usr/sbin/esxcfg-firewall --allowIncoming
root@casiopea:$ /usr/sbin/esxcfg-firewall --allowOutgoing
Para habilitarlo:
root@casiopea:$ /usr/sbin/esxcfg-firewall --blockIncoming
root@casiopea:$ /usr/sbin/esxcfg-firewall --blockOutgoing
Si quieren mirar las diferentes opciones que el comando brinda pueden solamente ejecutar el comando y ver lo que sugiere:
root@casiopea:$ /usr/sbin/esxcfg-firewall
fuente: http://www.itconsultingcrew.com/2010/08/como-deshabilitarhabilitar-el-firewall-corta-fuegos-en-vmware-esx/

![clip_image002[4] clip_image002[4]](http://blogs.technet.com/cfs-file.ashx/__key/communityserver-blogs-components-weblogfiles/00-00-00-65-01-metablogapi/8154.clip_5F00_image0024_5F00_thumb_5F00_36B26B16.jpg)


